How do I organize my layer tree?
The layer tree is organized by the administrator under the Data Layers tab.
Once you have added a few data layers (map services) into your project, consider the following:
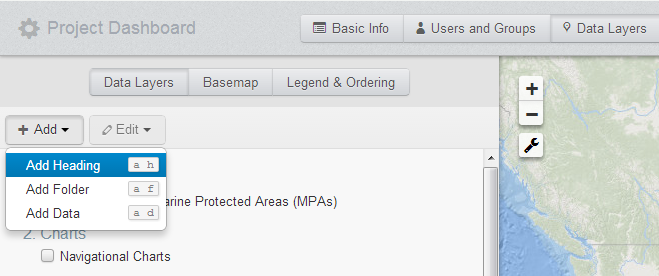
- Add headers to group layers together under a common theme. For example, you might create headers for "Biological Data" and "Administrative Boundaries". Add a header by clicking the drop down menu under the Data Layers tab called "+Add" and choose "Heading". You can also simply hold down the "a" and "h" keys simultaneously to bring up the add heading dialog box.
- To place a given layer under a header, you may drag and drop that layer under the header name.
Layer List and Ordering
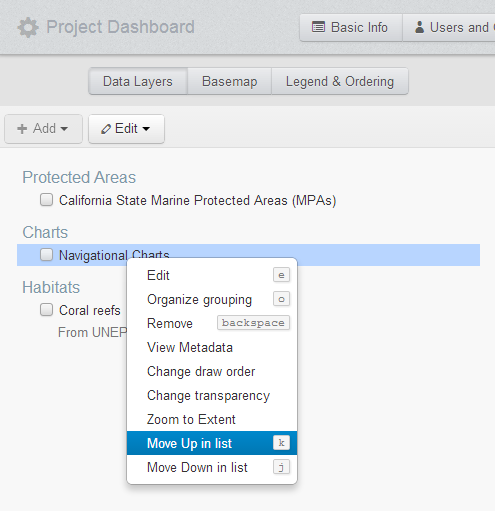
The two sub-tabs, "Data Layers" and "Legend & Ordering", allow you to organize (a) how the layer list will appear by default, and (b) the order in which they are layered (on top or below other layers) respectively.To change the order in which layers are listed in the table of contents, under the "Data Layers" tab, select the layer you wish to move up or down in the list and either right click or click the "Edit" drop down menu and choose "move up" or "move down". (You may also use the K and J keys respectively.)
Remember that layer ordering has to do with the order in which the layers appear on top / below each other. In other words, a layer that is listed at the top of the layer tree may actually appear below other layers on the map itself.
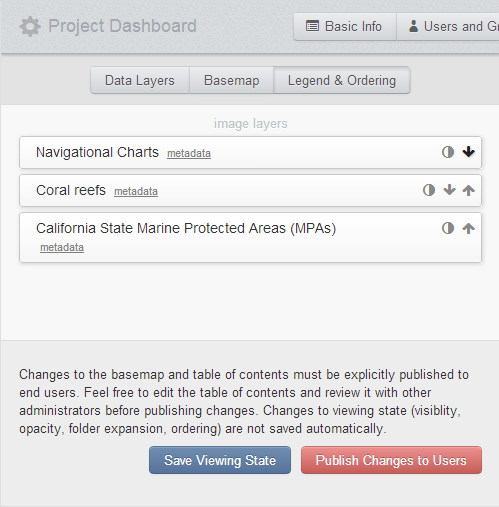
To change the order in which layers appear on the map (not the table of contents), click on the "Legend & Ordering" tab. In the case below, "Navigational Charts" appears at the top, above "Coral reefs" and "California State Marine Protected Areas (MPAs)". The down arrow at the far right of Navigational Charts can be used to move charts below the other two layers.
Layer names, descriptions, opacity and more
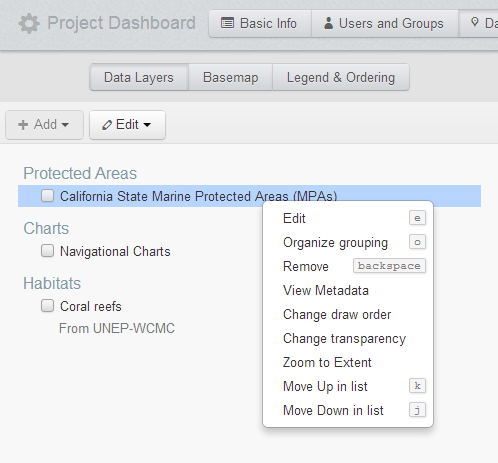
Cartography, the way the map data appear on the map, is defined when somebody publishes a map service. You cannot change the way the map data appear in SeaSketch except opacity. Under the Data Layers list, select a layer and right click to see a menu of choices. If you choose "Change Transparency", you will be brought to the Legend & Ordering tab.
Click the circular icon next to the layer name to bring up a slider that you can use to adjust the layer transparency.
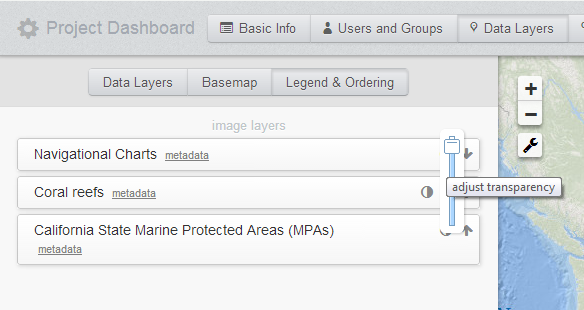
Use the opacity slider to decrease the layers opacity. This will be the default for all standard users but the users may decide to change it as they see fit.
Chose the Edit option to change the layer name, description, keywords (which are all used by the search function), enter a different metadata URL (if you have the metadata on another web site, for example), and a host of other display options.
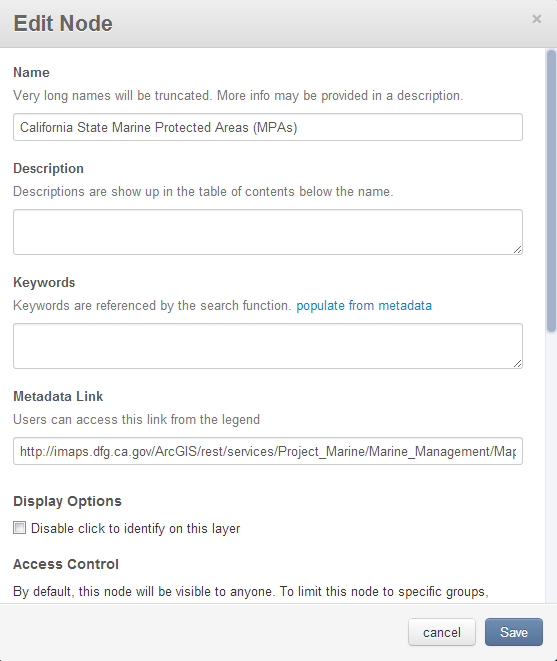
Scroll down for more options:
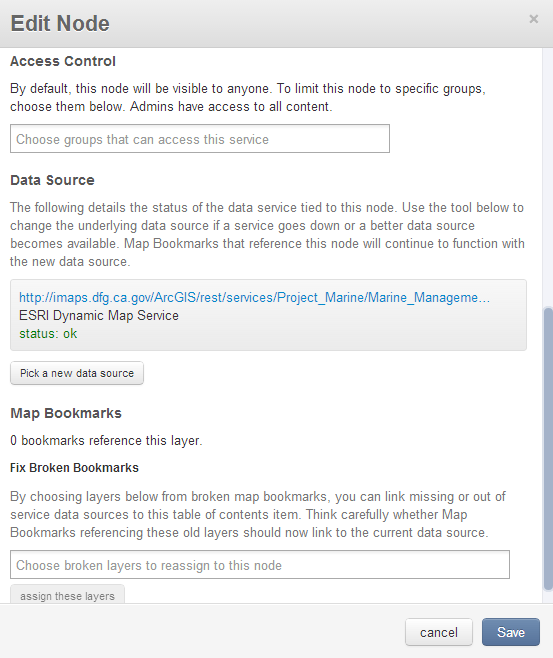
Depending on the type of node you are editing, you may see one or more of the following options:
- Show children as radio options: By default, all layers have a check box. When map services contain multiple layers, check boxes allow the user to turn on more than one of these layers at a time. If you wish to limit the user to viewing only one of the layers in a map service at one time, choose this option. This is helpful, for example, if a map service contains multiple aerial images that cover the same location. It wouldn't be helpful to turn on all of the images at once because they are completely overlapping. Turning them all on at once only bogs down the map server and performance is slowed. Instead, providing radio options ensures that only one layer at a time is turned on.
- Check-off Only: If your map service contains many layers then it may overload the map server by turning them all on at once. To keep users from doing that, you might check this box. This way, users can open the folder (node) to see what layers are contained within it and check on those they wish to see. Then, if they want, then can check the box next to the service name to turn all of the off at once.
- Disable click to identify on this layer: By default, map layers will display attributes when you click on a feature. In some cases, these attributes contain useful information and in other cases, the information is not helpful. If the attributes are not helpful, consider clicking this layer so that the attribute pop-up window does not appear when a feature is "identified" (or clicked on). (Of course, if you are the publisher of a map service, you should probably consider deleting any of these attributes before publishing your map service.)