How do I create new Plan Elements (i.e., Sketch Classes)?
Plan elements may include things like marine protected areas, aquaculture sites, transportation zones, renewable energy sites, fisheries management areas, etc. These are the types of things you might be planning for using SeaSketch. Each of these plan elements has a "Sketch Class" that must be defined by an administrator using the Project Dashboard. Once these elements - or sketch classes - have been defined in the Project Dashboard, any user may sketch a plan that contains points, lines or polygons and their associated attributes.
Importantly, sketches are ideally associated with some kind of analysis but they are not by default. That is, when a user sketchs a plan - say, a marine protected area - that plan could be used to generate a report on the potential consequences of the plan. The report might say what habitats are protected and the economic impacts of the proposed marine protected area. However, for this to work, administrators must associate plan elements (i.e., sketch classes) with some kind of analytic, or geoprocessing script. A user sketch, for example, might trigger a geoprocessing script that intersects that sketch with a series of map data layers that describe the distribution of habitats and fishing activities.
Plan elements, or sketch classes, may be defined without associating them with geoprocessing scripts and, therefore, sketches will not trigger any kind of analysis.
Defining a Plan Element without Analytics (Geoprocessing)
Administrators may define a plan element under the Sketch Classes tab of the Project Dashboard. Begin by clicking "+add sketch class" and give it a name and a geometry type. Click "Save Sketch Class" to proceed. Note that once you have defined the geometry type (point, line, polygon) this cannot be changed later.

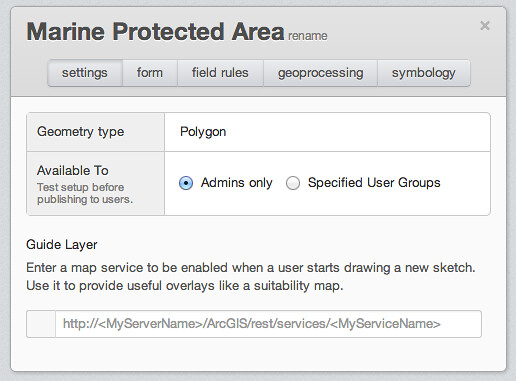
In the Sketch Class settings dialog box, choose whether to allow all users or administrators only to sketch plan elements. If you are simply experimenting with sketch classes, leave it as the default "admins only" setting.
If you wish users to always view a particular map layer as a guide in their sketches, you may provide the URL of an existing map service in the "Guide Layer" box. For example, you may wish users to always view a habitat or fisheries layer when drawing prospective marine protected area boundaries.
Click on the "Form" button and notice that there is one field - Name - that is required for all sketch classes. You may edit the description that will appear beneath the "name" label but you cannot edit the name itself. Click on "add form field" and notice the different types of attribute fields you may add. Currently we support text fields, text areas, choice fields, sliders, number fields, date fields, URL fields, and headers.

You may add any number of required or optional attributes and configure each separately. Consider limiting the number of attributes to those that you feel are really necessary. Users may get bogged down with too many attributes, particularly if they are required fields.
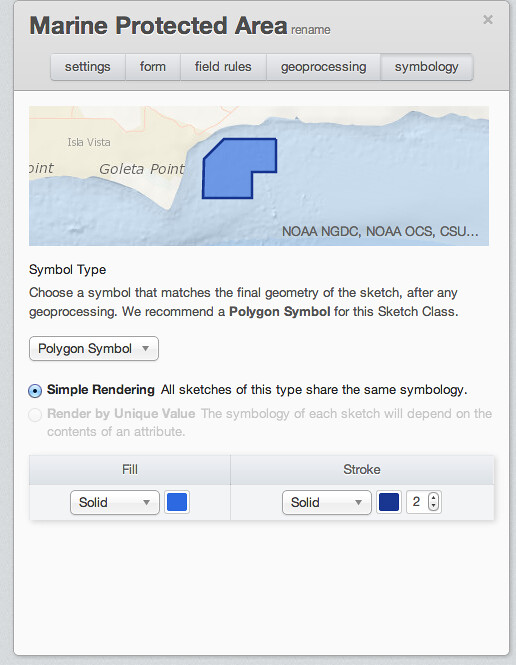
Click on the symbology tab to configure how the sketch class will look when users are sketching them. This may be changed later - something that could be handy as you create new sketch classes and want to distinguish them from each other or from map cartography.
At this point your sketch class is ready to be used and, if you have indicated that "Everyone" can use this sketch class, it will be immediately available to all users under the "My Plans" tab in the project view:

Adding Analytics to your Plan Elements (Sketch Classes)
This topic will be discussed more in future FAQs. For now, know that it will take a skilled GIS analyst to create analytics, publish them as geoprocessing scripts, and collaboration with the SeaSketch team to develop meaningful reports that are generated each time a sketch is created.