Symbolize a Sketch by an Attribute
Symbolize a sketch based on a choice attribute, so that different zone types, for example, are displayed with distinct symbology. You can configure the symbology of the sketch class with the below steps:
1. Enter the admin interface and navigate to Sketch Classes tab -> select a sketch class with an attribute that is a choice field -> Symbology sub-tab.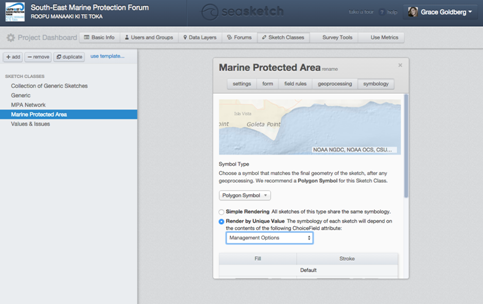
1. Enter the admin interface and navigate to Sketch Classes tab -> select a sketch class with an attribute that is a choice field -> Symbology sub-tab.
2. Select 'Render by Unique Values', as shown below. This will expand the tools to select symbology for each choice field option.
3. Select the choice field attribute that you will use to determine symbology from the drop down menu. (Ex. 'Management Options' below)
4. Scroll down in the panel, and see that the usual symbology controls have been expanded to include the ability to set symbology for 'default' and each choice option from the selected attribute. These symbology controls are identical to when you symbolize a sketch class with a 'Simple Rendering' of one symbology. You can manipulate color or pattern of the 'Fill' and the color, pattern and thickness of the 'Stroke' outline.
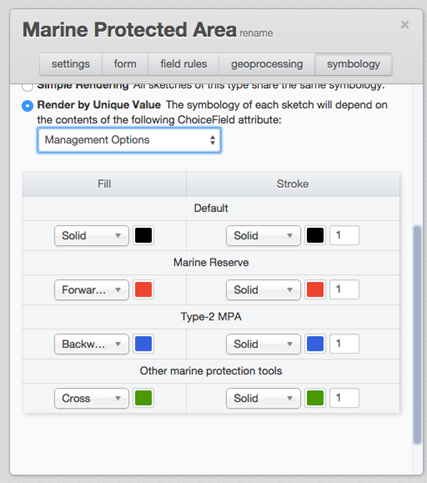
Note: The 'Default' symbology is shown when sketching, before you have set the choice attribute, or if no choice is made.